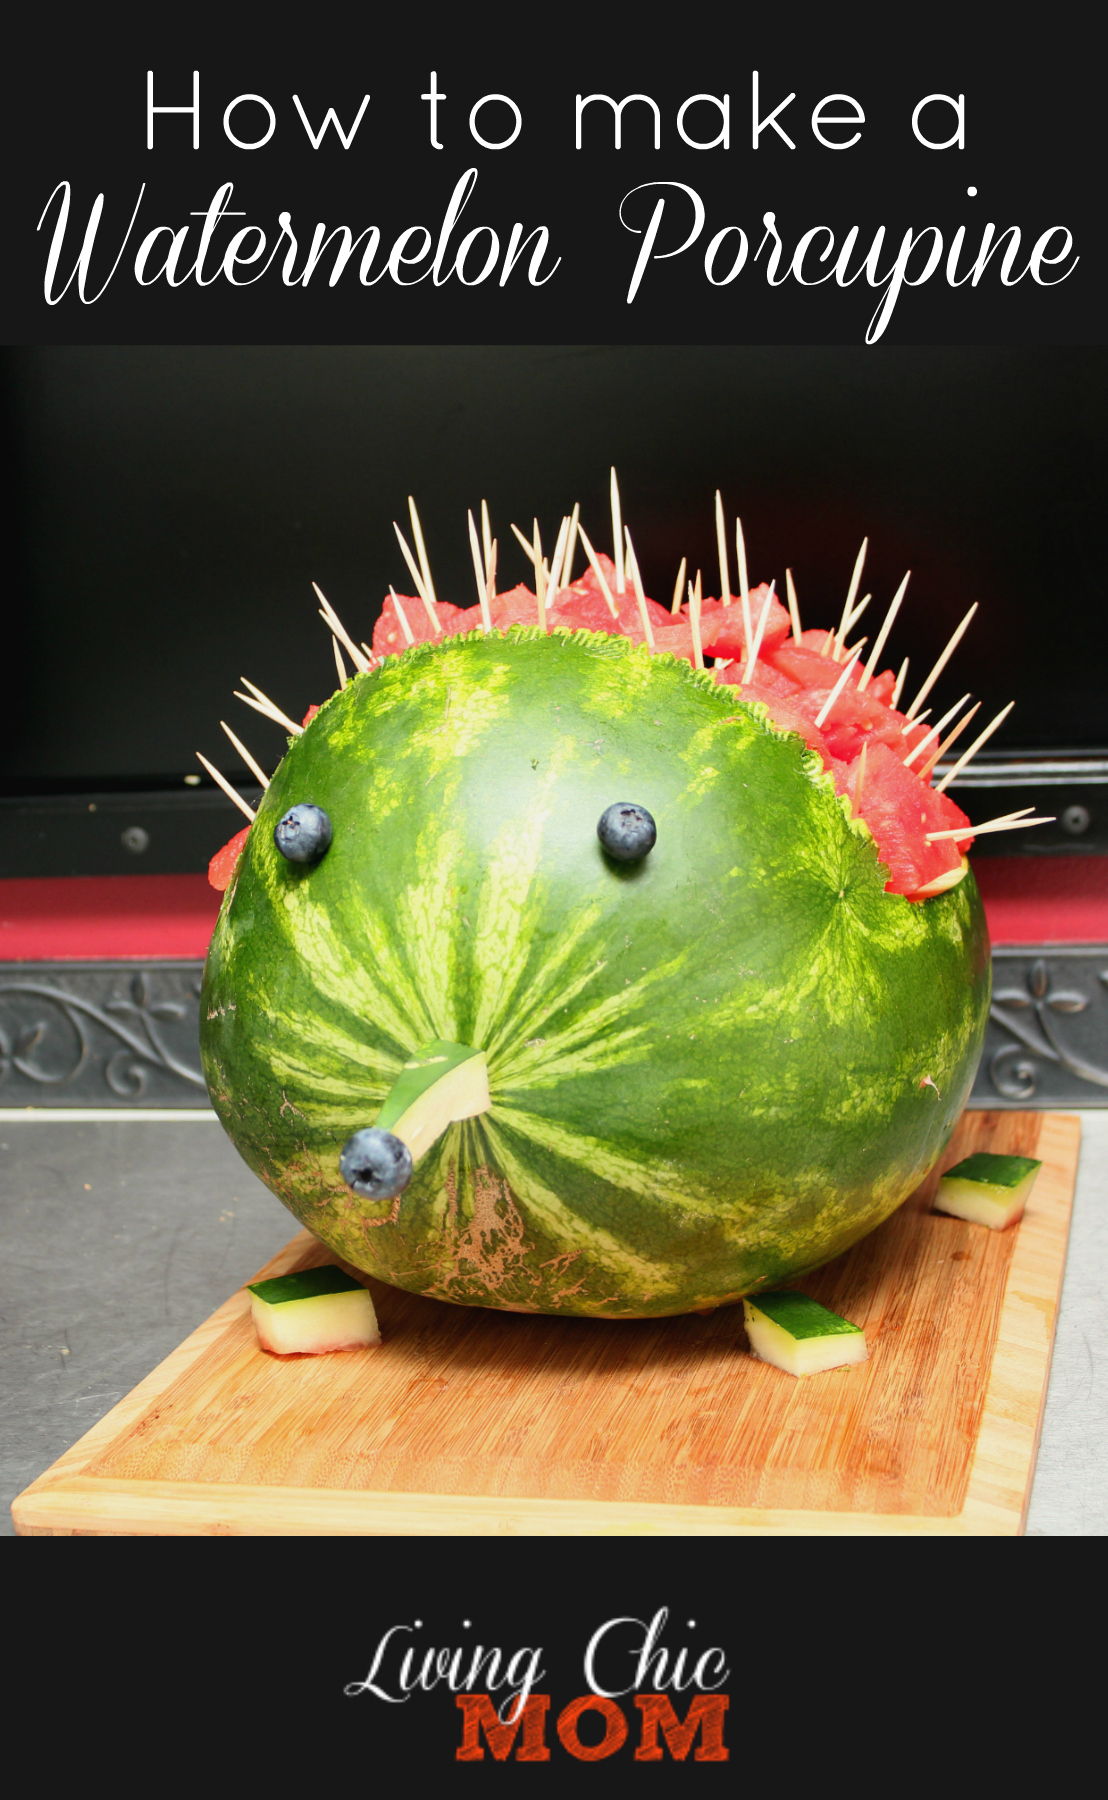
How to make a Watermelon Porcupine
How to make an adorable Watermelon Porcupine
First lightly mark watermelon with a washable crayon into the shape of a baby rocker. Next using a chef’s knife, cut the watermelon. Remove the top. Use the knife to cut around the edges of the watermelon flesh, and use a large spoon (or ice scream scoop) to scoop out the insides. Put watermelon pieces into a large bowl, pour out the extra watermelon juice(I used mine in my juicer to make a tasty drink for later).
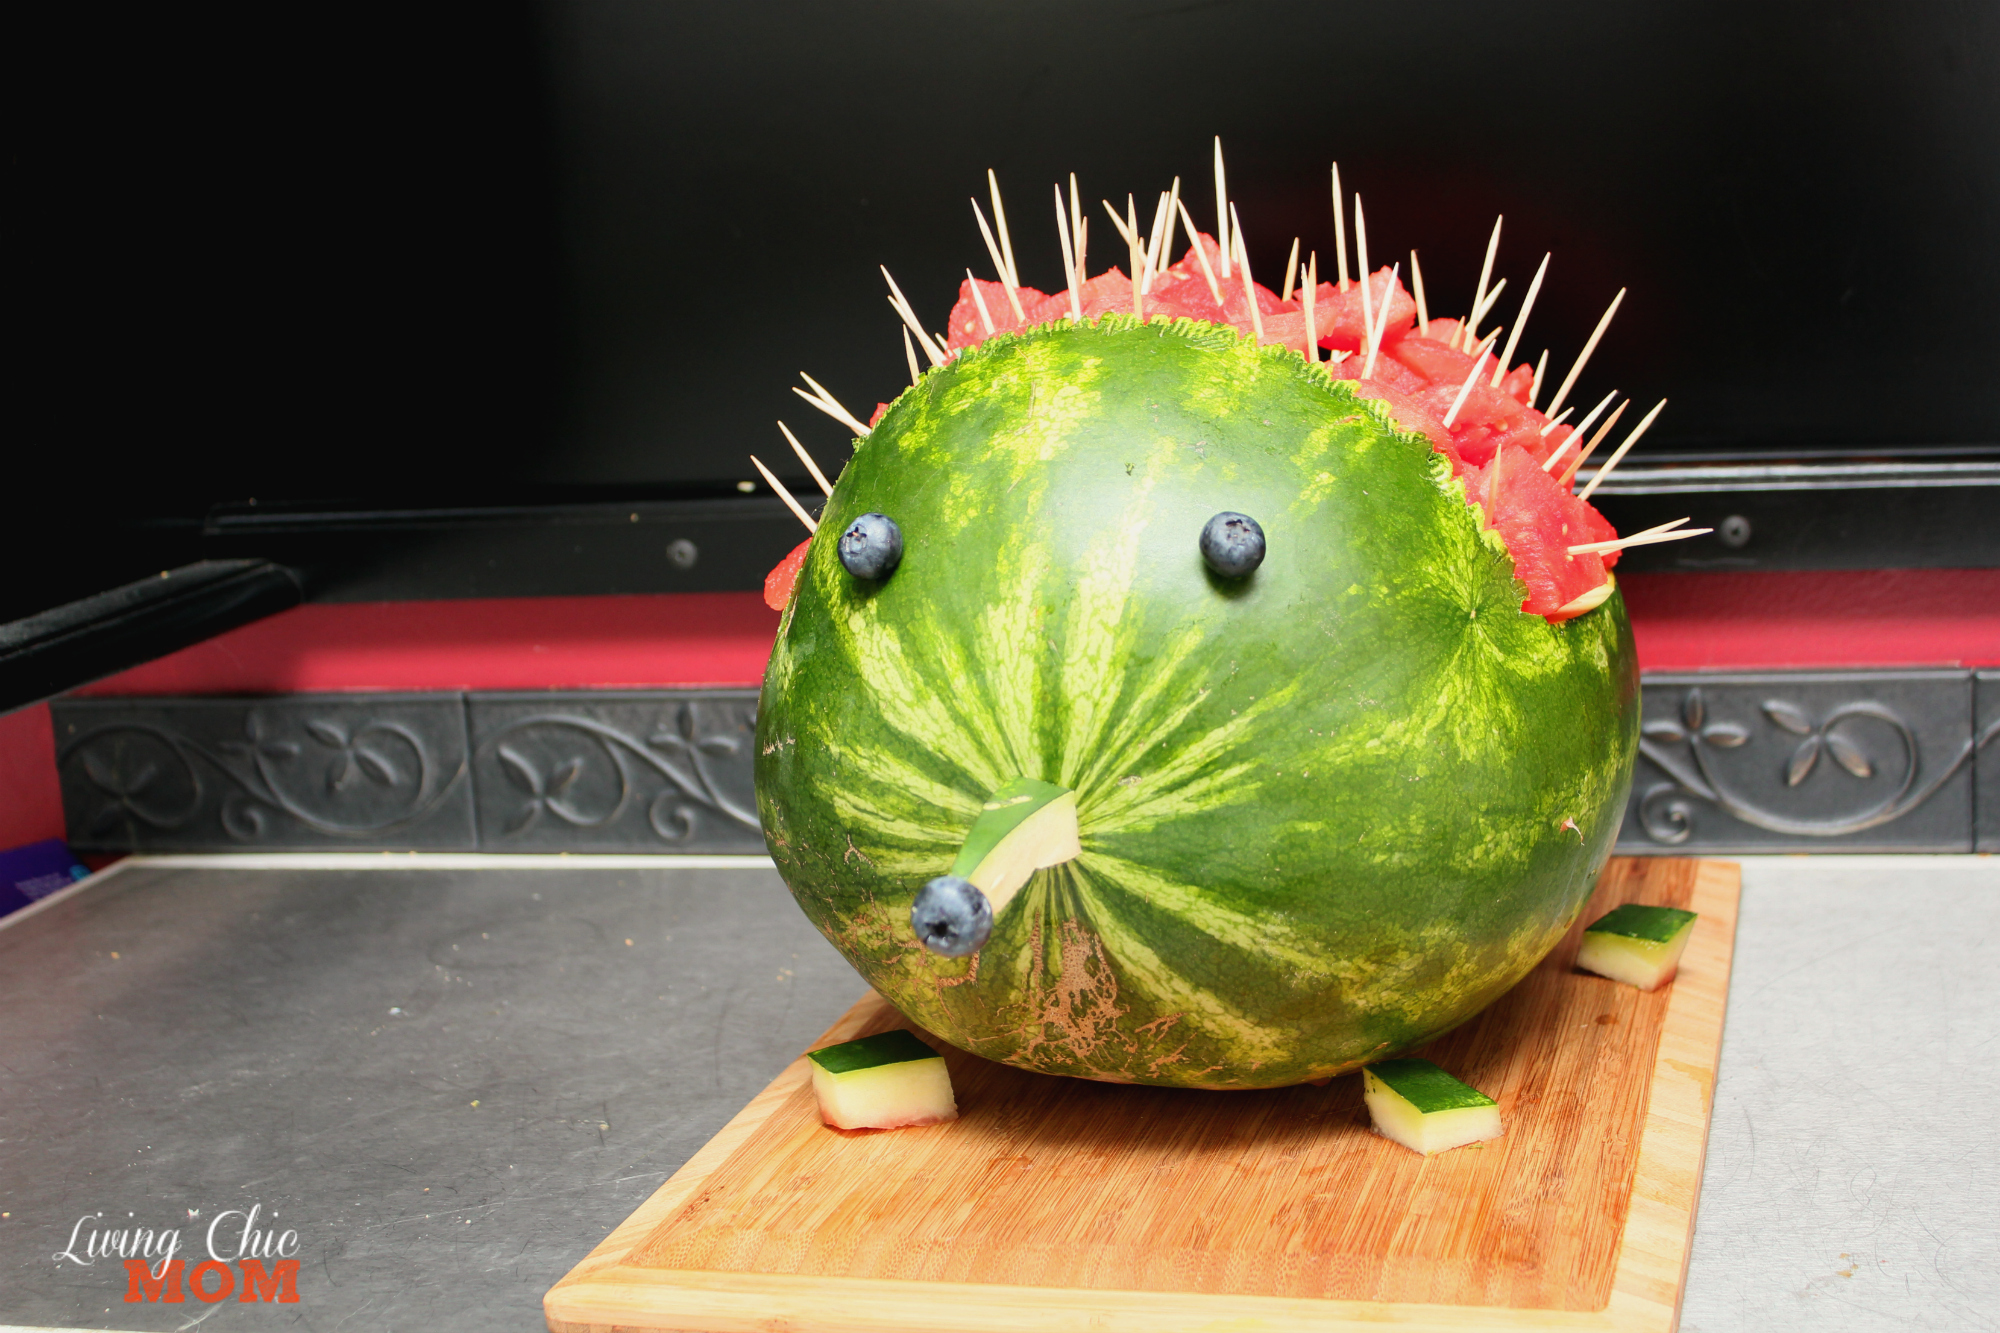
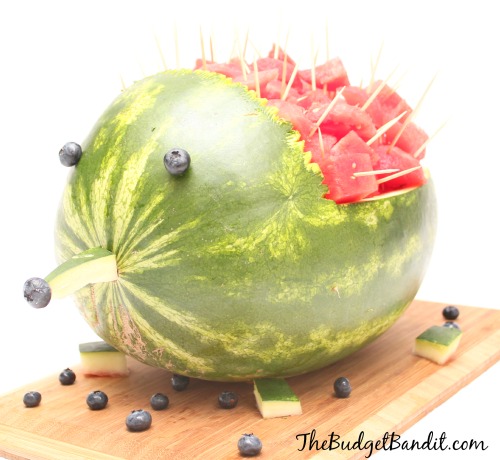
Use a small paring knife, create the cool spikey-do on the top of the porcupines head. I simply cut small little triangles. At the end I took a serrated knife and scratched the top up a little to create a more “hair” look.
Now to create the face. Using toothpicks create two eyes with blueberries, by skewering them through from the inside of the melon. Using the top piece you cut off the watermelon, cut out a triangle for a nose and four rounded pieces for feet. For the nose cut the tip off so it’s flat and you can attach the blueberry for the tip. Break a toothpick in half, and skewer the flat tip of the nose. Attach the blueberry.
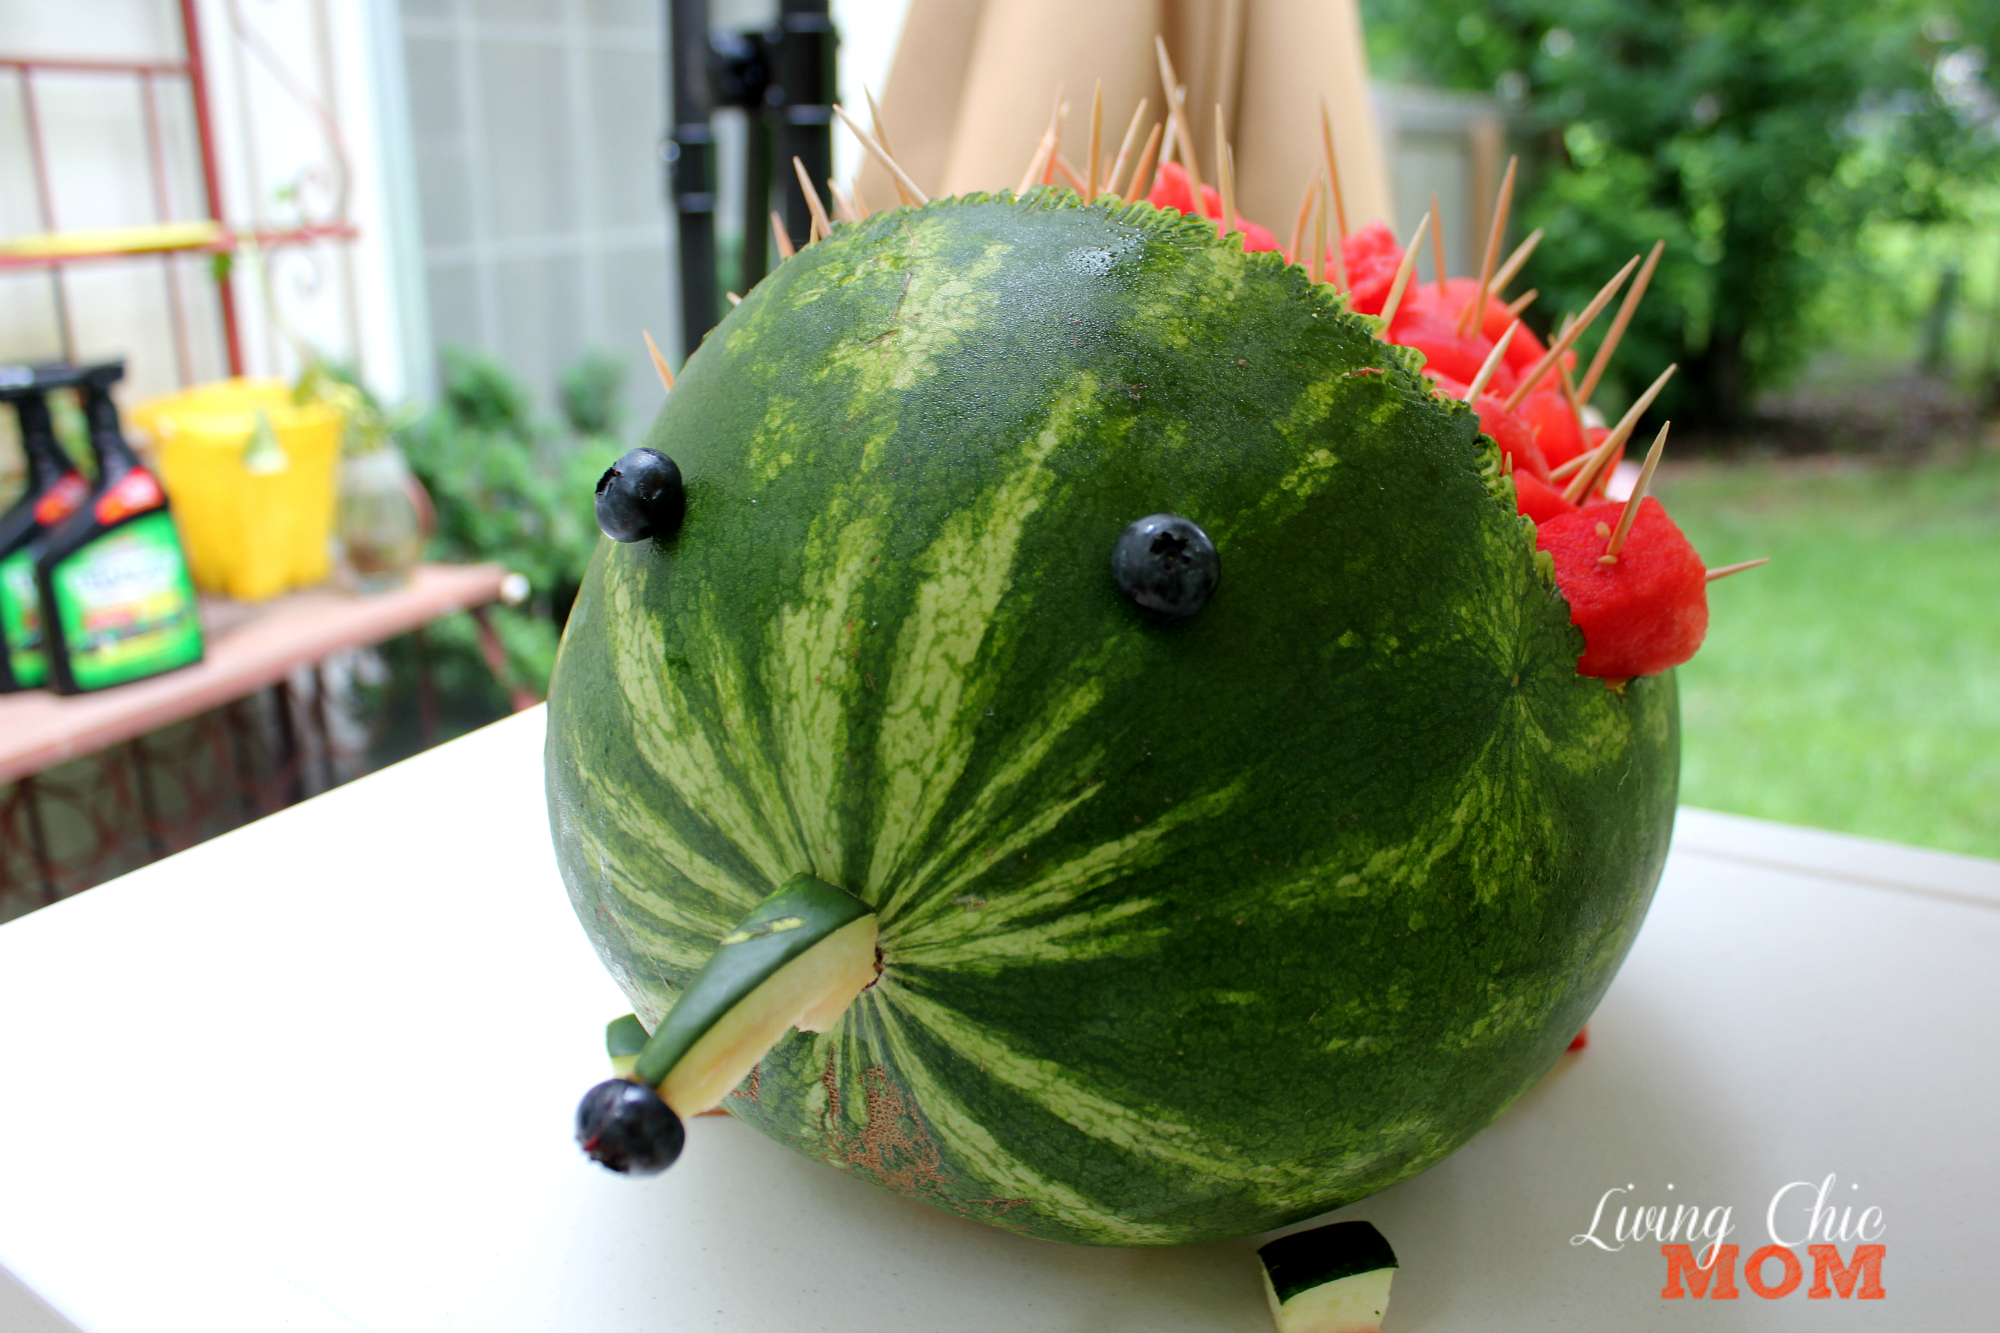
Fill with cubes of watermelon, and then insert a couple of toothpicks into each cube. I had several pieces of watermelon that were not really appropriate for skewering with toothpicks. I put those pieces on the bottom and then put the more “square” or “pokey” pieces on the top with the toothpicks.
Add the feet. be sure the bottoms have been trimmed flat so the lay flat.
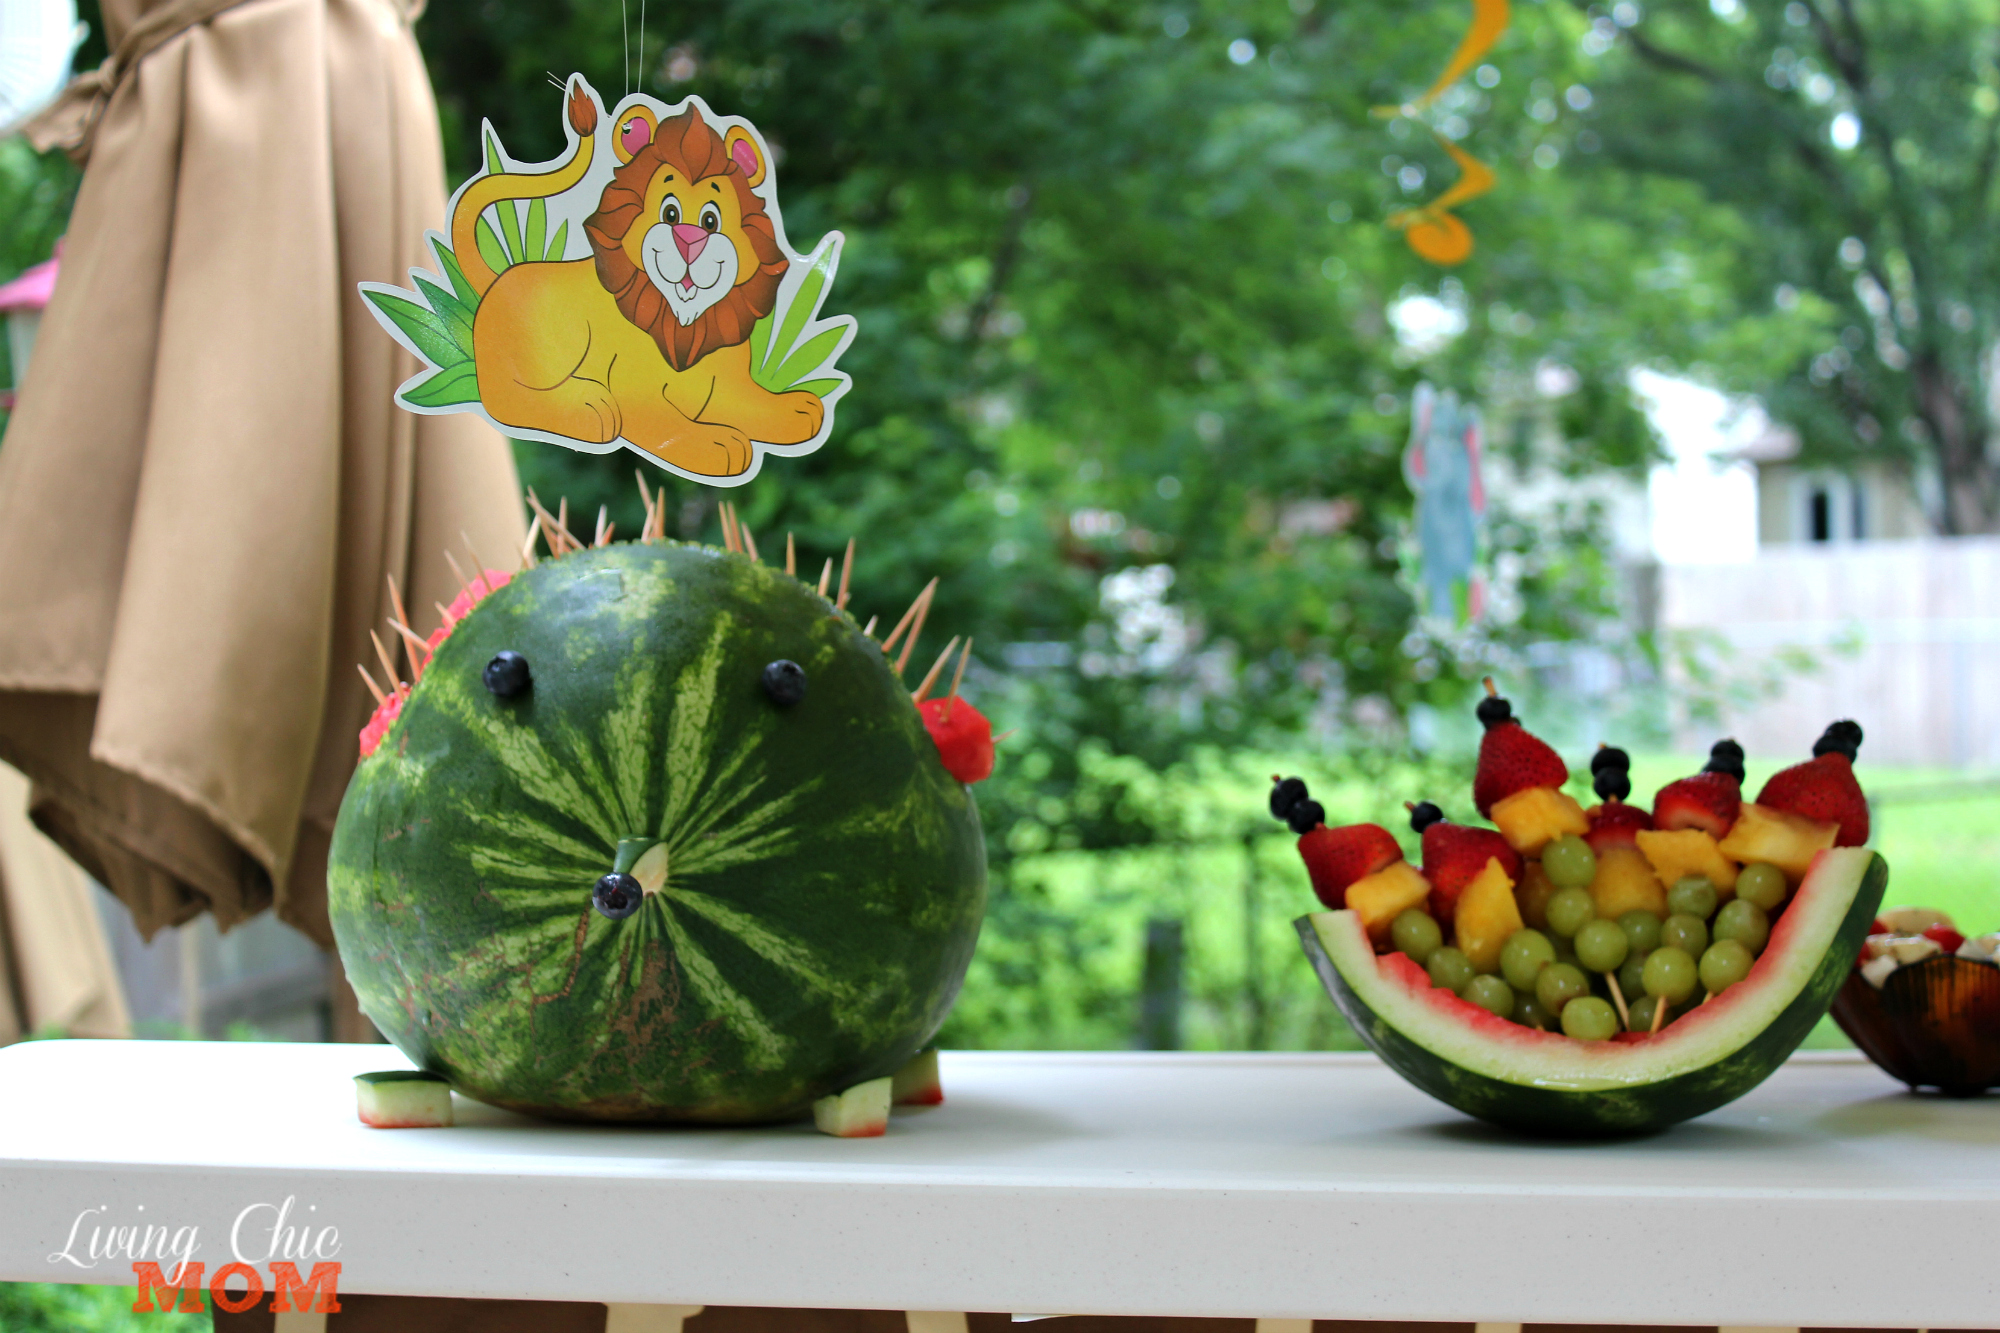
Viola! You have an adorable Porcupine Watermelon perfect for any baby shower, summer party or birthday party! Make sure to serve with extra toothpicks on the side and keep adding them to the cubes as your guests eat down through the layers.


You May Also Like

Upcycled Juice Box Plant Starters
DIY Cupcake Paper Flower Pencils