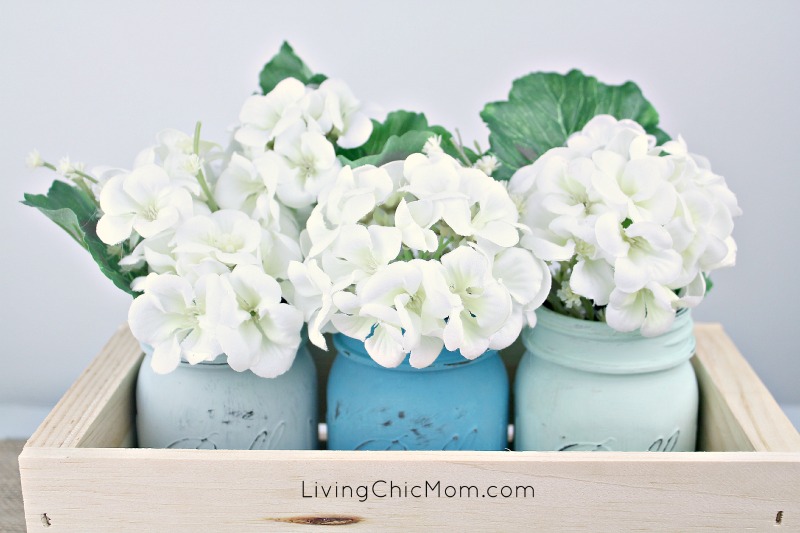
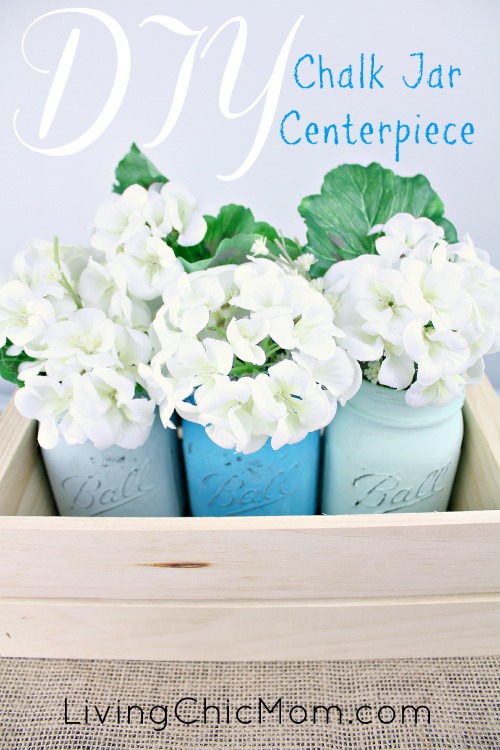
DIY Chalk Jar Centerpiece
Have you played around with chalky paint yet? If not than you definitely need to do so NOW! If you have already than you are totally going to understand what I mean when I say it’s “totally addicting”! Seriously I LOVE chalky paint! It’s super easy to use, adheres to almost anything, always turns out looking beautiful and totally fits into my shabby chic decor! These DIY Chalk Jars are insanely easy to make – in fact if you have some jars laying around your house and some chalky paint, you could whip up this centerpiece in just a matter of minutes! (Well about 30 minutes that is).
Supplies
- 3 Mason Jars
- Black Chalkboard spray paint
- DecoArt Chalky paint in up to 3 different colors
- Sponge paint brush
- Soft grade sandpaper
- Flowers to decorate with
Directions
- Spray paint jars with an even coating of black chalkboard paint. Allow to dry for about 10 minutes.
- Generously apply chalky paint to black jars. Allow paint to dry (takes about 5 minutes) and then apply a second coat.
- Once paint is completely dry, take your sandpaper and gently rough up/distress areas around the jar, allowing some of the black chalkboard paint to show through.
- Fill jars with some real or fake flowers and place as the centerpiece of a table!
***These jars would also make fabulous centerpieces for a wedding and are totally affordable!


One Comment
Pingback: